These ornaments are a great project for those small scraps as they use 3-inch fabric squares, but if you’re making a bunch it’s best to use a larger piece of fabric and make them assembly line style like I have. Just a note if you’re using scraps, you can use larger sizes of fabric scraps to make a bigger ornament, but you’ll need to increase the size of the button a bit and make a longer cut when you get to step 5.
Here’s what you need to get started:
fabric- two coordinating prints
double-stick fusible web (I really like the Steam-A-Seam2 as it’s nice and thick)
thread (coordinate the color with the fabric you’re using on the back of the ornament)
buttons (your preference, but around 12mm works best for this size ornament)
embroidery floss or string
tools:
iron, pressing cloth, and ironing board
cutting mat
rotary cutter
large plastic ruler
double-sided disappearing ink fabric marker
scissors
small-diameter needle
Before you begin, be sure to iron your fabric to remove any wrinkles, this makes it easier to adhere your fusible webbing.
Step 1: Make a fabric and fusible web sandwich.
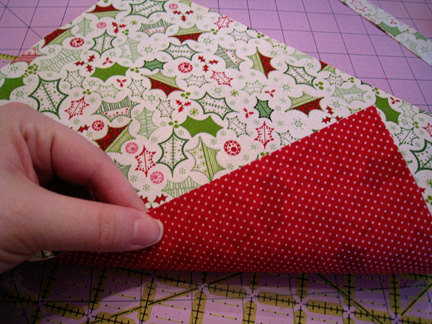
I’m a little bit lazy and break down my fabric into rectangles that are just larger than my fusible web- which is a 9″ by 12″ sheet. I peel one side of the fusible web off and attach it to the back side of the fabric, then trim off the excess fabric around the fusible web with a ruler and a rotary cutter. Then I peel off the paper from the other side and do the same thing with the other fabric. What I end up with is a sheet of fusible web on the inside, and the correct side of each print facing outwards.
Step 2: Make it stick.
Set your iron to the correct setting. Using a press cloth to protect your fabric, start in one corner and working your way all the way across and down, rest the iron over each part of your fabric sandwich for about 15 seconds. Check the edges, if they aren’t sticking together, you may need to go over some parts again that aren’t stuck together.
Step 3: Strip!
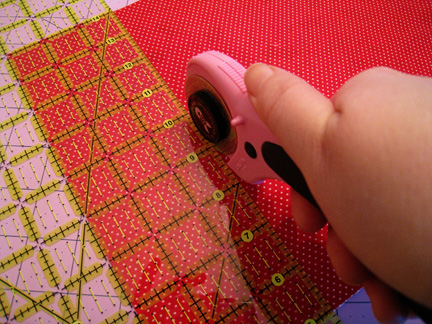
Now that I have a 9″ by 12″ sheet of double-sided fabric, I use a cutting mat, rotary cutter, and a ruler to cut it into 3″ strips which I then cut down into 3″ blocks.
Step 4: X marks the spot.
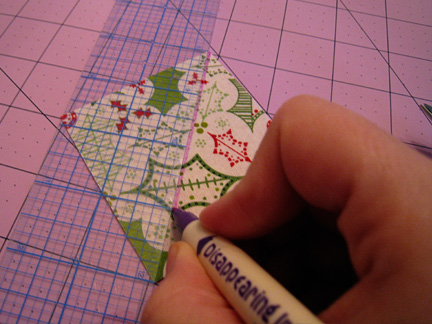
Use a double-sided disappearing ink marker to find the center of each square. Line your ruler up diagonally from endpoint to endpoint and draw a line with the purple ink. Do the same for the opposite endpoints. Where the lines cross is the center. Mark that off for future use. I like using the blue side of the marker to mark the center as the purple disappears too quickly.
This should be done on the FRONT side of your ornament.
Step 5: Measure, then cut.
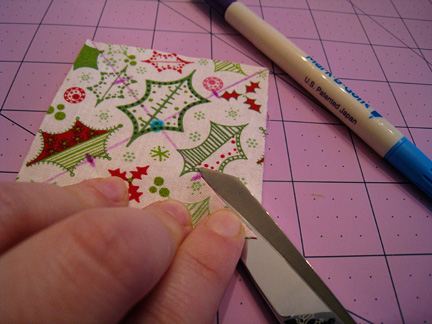
Using the purple X you made on the fabric, make a mark on each line 1 inch away from the center point. Then, using scissors, cut from the corner of the fabric along the purple line up to the mark you just made. Do this for each corner. (Note, if you’re making a larger ornament, the cut ends up being about half the length of each segment of the X.)
Step 6: Make a big knot.
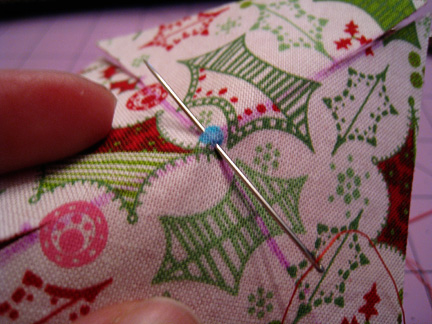
Thread the needle with a double thickness of thread and make a big knot at the bottom. Starting from the front of the fabric, one one side of blue dot in the center, pierce the needle through the fabric to the back and then up through the blue dot in the center of the fabric so that your needle and thread are once again on the front side of the fabric.
Step 7: Fold.
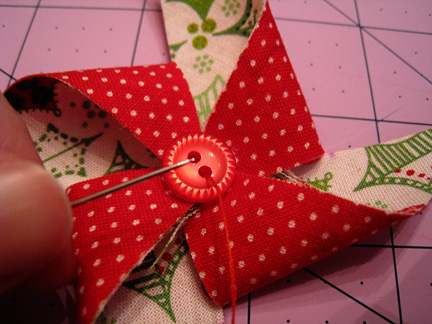
Fold over one of the corners of the fabric along the purple line so that the outer point folds inward to touch the blue dot. The back fabric should now be facing outward on this piece and the outer fabrics will now be hidden and facing each other. Run your finger along your fold just to crease it slightly. Bring the needle through the corner of your folded over fabric, so that the thread comes up from the bottom and through and your fabric. Do this for every other cut corner until you have the pinwheel shape and the needle has gone through each petal. Once all of the petals have been formed, make a stitch across the center and bring the needle through to the back of the ornament, then back to the front center of the ornament.
Step 8: Button up.
Slide the needle through the button until the button falls down the thread. Position it in the center so that it covers up all of the corner pieces of the petals. Sew through all of the layers to attach the button. I usually like to make about 4 stitches, then bring the thread to the front and make my knot beneath the button so that it is hidden.
Step 9: Loop de loop.
Cut a length of string or embroidery floss- I do about 6 inches. Loop the string once around the u and pull on it until the tails are even at the top, then tie a knot once around the button. Then make a knot at the top so that you have a way to hang the ornament. You can trim off any excess thread at this point.
Step 10: Hang it up.
This is my favorite step. Hang it on your tree (or give to a loved one to hang on theirs) and enjoy how lovely it is!
Please note:
I wrote this up quickly with quite a few distractions, so if there is something that isn’t clear, please feel free to ask for clarification. I won’t be offended, I promise!
Oh, and if you make one of these I’d love for you to share! Feel free to comment and post the link so that we can see yours!






thestitchinchicken said,
12.17.09 @ 08:18 am
Those ornaments are adorable! I think I am going to have to make a couple right away, thanks so much for sharing Kiki!
julee said,
12.21.09 @ 02:31 am
These are SO cute! I’ll definitely have to be making these! 🙂
lynne said,
06.17.10 @ 07:52 pm
Wow, they are stunning! They will be fun to make, thanks for posting the pattern. I have a big jar of buttons that I can use.
I would really like to use the same fabric, what line is it?
Art Project « Kiki(verde) said,
09.3.10 @ 08:25 am
[…] Unless, you are like me and left your laptop on top of your mat when you were working on your Christmas ornament tutorial and the heat from the fan warped it so that it no longer lays flat and you had to go buy a second […]
Linda said,
12.19.10 @ 11:53 pm
Those are soooo cute…I’ve got to try them!!
Tracey said,
12.27.10 @ 08:01 am
Excellent, thanks
Tracey
What Can You Do With a Fat Quarter? said,
05.10.11 @ 07:31 am
[…] (Set of 4) Pinwheel Ornaments: […]
Heart Blog said,
11.18.12 @ 01:37 pm
Details Of The Poinsettia Decorations Large Notebook…
[…] formed, make a stitch across the center and bring the needle through to the back […]…
men's patagonia torrentshell jacket said,
06.5.13 @ 03:02 am
we, supposed, was meant to attract the neighbouring
blacks. They had arranged a number of signals between themselves.
On the Early days with the Peak Downs Field from “The Peak Downs Telegraph”.
What Can You Do With a Fat Quarter? said,
11.19.13 @ 03:30 pm
[…] (Set of 4) Pinwheel Ornaments: […]
Holiday Ornament for guild swap | Quilting Sisters Unravelled said,
12.22.14 @ 07:08 am
[…] https://kikiverde.wordpress.com/2009/12/16/how-to-make-poinsettia-pinwheel-ornaments-a-tutorial/ […]
Terry said,
12.13.20 @ 04:28 pm
I might actually be able to make these cute windmills. Your instructions were very clear and easy to understand.
Thank you
Terry
Judy said,
06.22.21 @ 11:36 pm
Thank you for sharing. Very sweet and the instructions are very clear!
Diane said,
11.3.21 @ 11:34 am
I love this!! I can’t wait to make some for my tree